Showing posts with label recycling. Show all posts

Tuesday, June 12, 2012

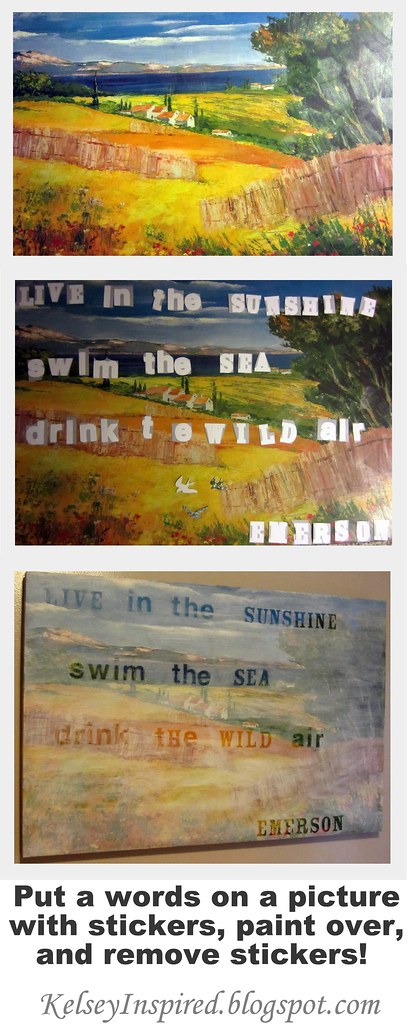
DIY : recycle old painting with quote art


Well like all other breathing 25 year olds the majority of my inspiration comes from pinterest these days.
I found a DIY art project I wanted to try

                                                                         Source: craftgawker.com via Kelsey on Pinterest


I had a painting under my bed for at least 10 years (no joke) that I picked up at a yard sale and had always intended to re-purpose.  I liked it because it was large, and have a good frame so I could easy re-cover it with canvas and paint a new picture or something.
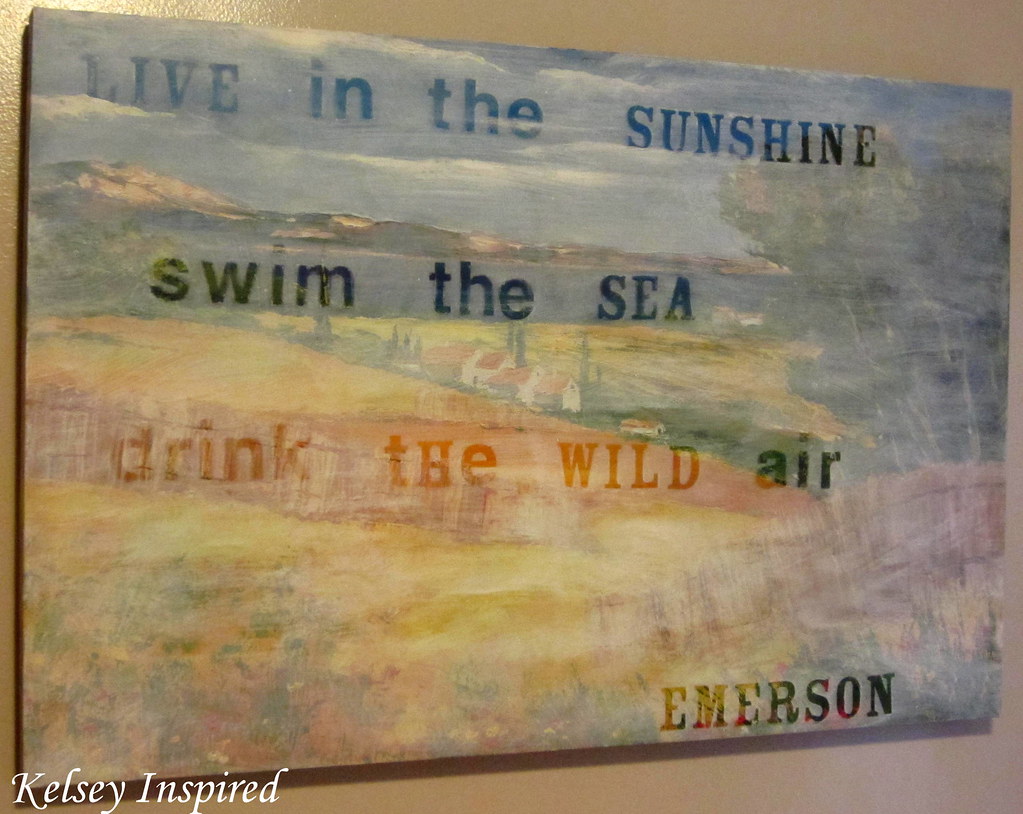
Well flash forward a decade and I saw this and remembered my sad, forgotten painting.  And then I breathed new life into it and it proudly hangs above our bed.

This is SUPER easy to do.
promise.

All you need is:
  • a painting or some type of picture with colors that you like
  • paint - I used cheapo white acrylic paint from Hobby Lobby for $1 and then added a little paint thinner because I wanted some of the original artwork to show through
  • letter stickers - I bought some on clearance at Jo-Anns
  • a paint brush
  • time 
Choosing a quote is probably about the hardest part.  I had so many ideas running through my head... but I ultimately decided on this one because I love it so much.  It has a special meaning to me ever since we lived in Grenada.  We lived in the sunshine, swam the sea, and drank lots of wild air...... 


I love how Emerson turned out.  The colors are perfect behind the words.
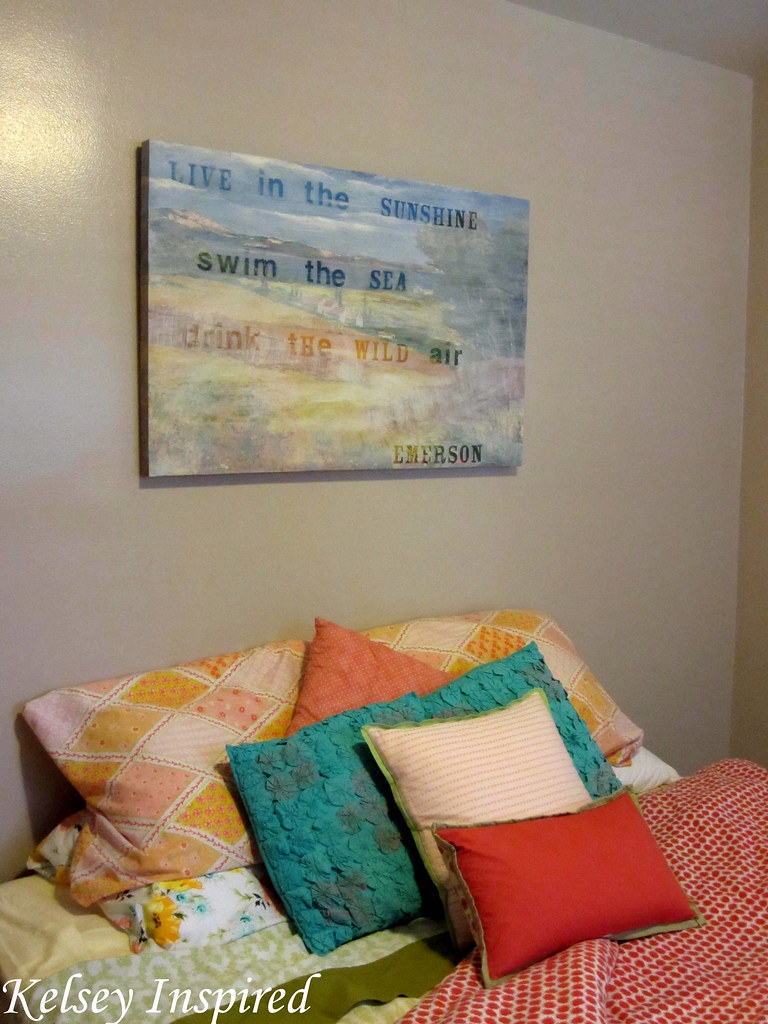


the bedroom isn't finished as of yet.... just this lone painting hangs on the wall.
my husband said "do all these patterns go together"
ummm not exactly. and I like it that way.


Sunday, October 16, 2011

Sparkly shoe makeover

I have this pair of sandals from Forever21 that I've had for almost 2 years and if you've ever had Forever21 shoes you know they don't really last.  These were on their last leg.  If I wasn't in Grenada they'd probably be in the trash, but keeping with the make-do attitude I decided to turn them into part of my Halloween costume!

IMG_1488
before. You can't tell but the white was pretty dingy and cracking.

Add a little sequins and glitter...
IMG_1491


IMG_1532


Do you have a guess as to what I'm going to be??
guessing is not open to my friends here in Grenada who already know!
or my Mom, she knows too. haha.


Sunday, September 18, 2011

beauty from the rubbish

You're going to think I'm crazier than ever... but last week when I went on my twig hunt {and came home with that sign} I also came home with a random piece of metal wire, kind of like that used for a cage or something.
When I first saw it I thought it would be great to hang my earrings on, I've seen similar DIYs all over the internet, but once I started looking at it, I got a different type of inspiration. 
I have been drying some different flowers and leaves for fall decorations and decided that the rusted wire and the dried flowers would be a great combination.

IMG_0157

Putting the fear of tetanus aside I began flattening out the wire and trimmed it down to about a 10x10in square.  After cutting the wire I bent the sharp edges down.

IMG_0163

Arranged the dried flowers and hot glued them to the wire.
IMG_0186

Added a little lace across the top for a hanger.
IMG_0189

And since my hanging options are limited... I temporarily hung it from the light switch.
IMG_0357
side note: see that red switch? it's to turn the heat on for our shower! crazy!


This week I'll be sharing some more of the little bits of fall I'm bringing into our home! 
Who's to say that because it's still a tropical island outside it can't be autumn in inside? :)


Monday, August 29, 2011

7 things to recycle into art & craft projects

We all know I'm currently living in Grenada, but did you know that Grenada has NO form of recycling other than re-using glass beer bottles?  Sad but true.
I cringe every single time I throw something away.

I decided to compile a list of some easy, cheap, recyclable projects you can do with the stuff sitting in your trash can [in Grenada] right this very minute.

1. Paper - magazines, newspaper, medical school notes, etc
    2.  Cardboard - cereal boxes, shoe boxes, packaging
    3. Glass - pop bottles & jars
    4. Tin Cans 
    5. Plastic
    6. Wood
    7. Fabric

    Anyone have a good idea of how to reuse styrofoam for art or crafting?? Or do you have a another great recycling project to add to my list?

        Source: etsy.com via Sandie on Pinterest

        Sunday, August 14, 2011

        Jute ampersand

        If you've been around my blog much you know that I have developed a love of jute twine.
        It's beachy and cheap! 2 of my favorites

        Most of my inspiration comes out of the blue and fast, if I have something in my head I must do it NOW.
        I woke up with the crafting bug eating away at me and soon decided I wanted to make a 3-D letter.
        My 1st thought was of making a letter 'C' and to glue EC coins all over it, like those I made the earrings out of.  I quickly changed my mind to doing the ampersand instead... and after playing around with the coins I decided that it wouldn't look quite as sleek as I wanted so I scratched that and turned to my reliable twine.

        IMG_6388
        I sketched out an ampersand on the cardboard which was leftover from some packaging
        IMG_6389
        cut it out
        IMG_6395
        and started wrapping the twine around
        IMG_6396
        the back is messy, but no one is going to see it.  I tied a knot when I started and used hot glue to secure it down.
        IMG_6398
        the angles made it hard to continuously wrap the twine around... so I had to leave some bare spots which I later when back and filled in.
        IMG_6442
        I decided to dress it up with a couple sand dollars I had laying around and add to it's beachy-ness
        It is photographed hanging from our shutters outside because the lighting was much better than inside.

        I made this ampersand mostly as another souvenir to take back to America with me in December.  I am running out of space in this tiny apartment to keep up with all my crafting!  I can't stop!

        So it gets added to the growing pile of souvenirs I have.  Are there support groups for this type of thing??


        IMG_6456

        IMG_6455

        IMG_6458


        linking up with:
        http://www.creativejewishmom.com/

        Saturday, June 18, 2011

        subway sign-ish art

        I found this piece of wood literally on the side of the road.
        and drug it home.

        and it sat here for probably 2 months. until I brought some paints back to the island with me & got inspired to paint it like a subway sign.
        well.... it's kinda hard to paint perfect letters you know. so I went for something a little easier.
        Lee and I's song (kinda) is Firefly by Jimmy Needham.  we have like 5 songs. but this is one of the best I think.
        It's fun and sweet.
        so I used a line from it and wrote it out on the board and Lee loves it!
        :) it makes me even happier when he approves of my antics.

        IMG_4729
        before. I just washed it off and took the nails out.

        IMG_4744

        IMG_4746

        so it's a little huge. I literally have no where else to put it.... and I think it kinda balances things out. just ignore that half of it is hanging off the edge of the desk.


        linking up with:
        http://iamalongfortheride.blogspot.com/
        http://iamonly1woman.blogspot.com/


        Friday, June 17, 2011

        shoebox shelves

        I promise I will be better at blogging.
        I've had a less than inspirational week.
        I've been sick and unmotivated.
        But today I kicked myself into gear and went out into the world and tried to be crafty & I completed 3 projects today!! I'll share the others soon.

        I brought some paint back to the island with me and felt inspired to paint today... but didn't have a ton of options for what to paint on, so I dug out some cardboard boxes I'd been saving (b/c Grenada has made an even bigger hoarder out of me) but got sidetracked b/c I remember my sister in law showing me how to make a shelf out of a shoe box about 15 years ago and a light bulb went off.
        I took the box lid and held it up to the wall and liked the idea.

        Q: "But you live in a concrete house! How will you hang a shelf?!"
        A:  HOT GLUE.  A trick I learned living in a concrete dorm freshman year of college. it works

        so I covered the lid in some scrapbook paper and hot glued the sucker to the wall!
        only problem? you can't really "use" said shelves... the stuff has to be really, really light weight.

        IMG_4735
        the box lid.

        IMG_4737
        hot glued to the wall.

        IMG_4739
        light weight objects added.

        IMG_4742
        the shelves are above my "crafting" area. which is some baskets full of crap. which is why it isn't in the photo.

        Tuesday, May 24, 2011

        bottle vignette

        vignette - a small decorative display

        this project was: recycling, cheap, and fun.
        3 of my favorite things.

        I have an awkward space above a row of cabinets that divides my kitchen and living room (if you call 5ft x9ft a kitchen)
        I am always trying to switch it up and make it look interesting.
        The space usually holds my conch shells and sea fans, but I am attempting to smuggle them back to American with me this week, so they are wrapped nicely and packed away. and the space was left empty.

        I had a bunch of glass pop bottles I had been saving (Grenada doesn't recycle and it nearly kills me to throw away a glass bottle.......... )

        So I decided to try something out with them and this is what I ended up with!

        IMG_4296

        IMG_4297

        IMG_4298

        all you need is glass bottles, water, and food coloring! :)

        Anything Related

        Sunday, May 15, 2011

        Art class with kids: recycling art

        At the Montessori School this week we made shadowboxes out of cereal boxes and magazine scraps.
        I had so much fun making my demonstration box that I want to keep it!
        only problem is, like I've mentioned I live in 300sq feet and it is filling up with "art projects" :/


        IMG_4216


        What you do is cut a square out of the front of a cereal box to make the frame for your shadow box.
        Then on the piece of cardboard that you cut out you start gluing magazine scraps to make a scene. I think it looks better when some of the pieces stick out to make it look 3D, like the grass.
        An underwater scene would be awesome don't you think?
        and it's a free, recyclable craft you can do with your kids :)


        Keeping It Simple

        Saturday, May 14, 2011

        Decorating with paper #2

        I've already written this post once before. and then  blogger decided to stop working for an entire 24 hours. 
        Did that happen to yours??
        anyway.

        I love magazines more than your average girl. At my parents house I have magazines that span 4 decades.  I can't get rid of them.  I am obsessed.
        Lately I have found the courage to chop up a few... granted they are Grenada travel magazine, but still.

        Here is one version of a magazine basket.

        Step 1.
        Cut magazine pages into about 2 inch strips. (I chose pages that were mostly white to make a white basket, but you can use any pages)  Fold in half and open back up.  Fold each side into the middle and then refold in half so you will have 4 layers instead of only two.  This makes the strips stronger. Secure with glue (I used a glue stick)
        P5102862

        Step 2. 
        Start with one strip and roll into a spiral, securing with glue.  Continue overlapping the strips until you have a circle the size you want the base of your bowl to be. (you could also end with this step and have coasters!)
        P5102861


        Step 3.
        Your next strip will start slightly above the others to begin building the sides of the bowl. Continue overlapping the strips while moving slightly upwards to build the sides of the bowl.  End when you feel like it is tall enough!
        P5102864

        Step 4. 
        This isn't necessary but I added a little bow and handle for decoration :)
        P5102863


        The Best Part Of Believe

        Related Posts Plugin for WordPress, Blogger...